
Enjoy a free 30-day trial of our
data validation software.Experience the power of trusted data
solutions today, no credit card required!Enjoy a free 30-day trial of our
data validation software.Experience the power of trusted data
solutions today, no credit card required!Enjoy a free 30-day trial of our
data validation software.Experience the power of trusted data
solutions today, no credit card required!Enjoy a free 30-day trial of our
data validation software.Experience the power of trusted data
solutions today, no credit card required!
Experian Data Quality for Salesforce: Free Trial Introduction


Introduction
Experian Data Quality for Salesforce provides real-time verification of addresses, emails, and phone numbers, and bulk cleansing of addresses. This is a powerful tool that’ll allow you to detect and remove inaccurate data from your database. We help ensure that your data is always fit for purpose, the first time around!
This blog post provides a walk-through of deploying a trial instance of Experian Data Quality for Salesforce into your environment. The goal is to help guide you through the set up of the application within the Accounts, Contracts, Contacts, and Leads standard objects. Happy installing!
Installation
- To access a trial version of Experian Data Quality for Salesforce, the application must be installed from Salesforce AppExchange into your environment, custom fields must be configured for validation on each object, and touch points must be enabled to trigger verification.
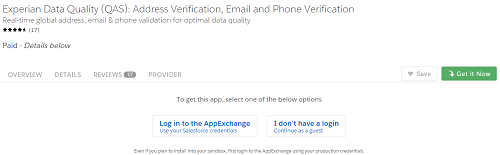
2. You will have the option to install Experian Data Quality for Salesforce in your production or sandbox environment. For testing purposes, the application should be installed in your sandbox. However, the trial can also be accessed if installed in your production environment.
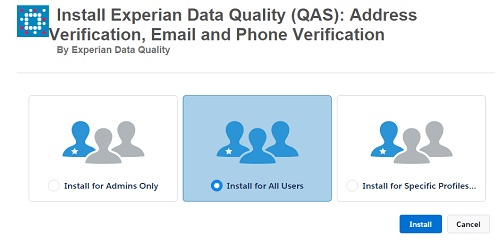
3. “Install for All Users” must be selected to proceed.
4. Once the app is installed in your Salesforce environment, navigate to the EDQ tab
At this point, you will be prompted to approve third-party access. Third-party access must be granted in order to proceed.
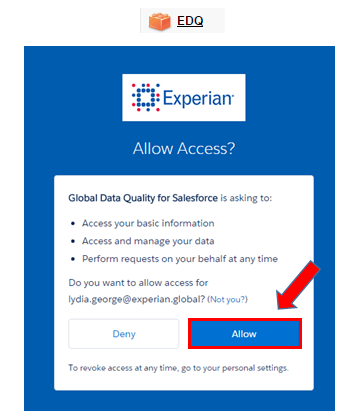
5. Navigate to All Tabs to find the pictured Experian Data Quality icon. You will be prompted to grant permission to access your account. Click “Allow” to proceed to the trial page.
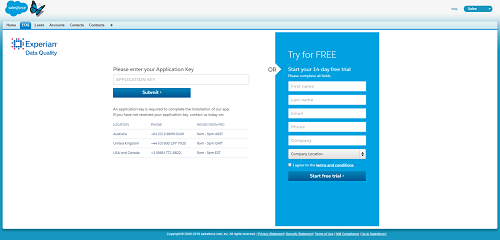
6. To begin your free trial, fill out the requested fields and proceed to the wizard.
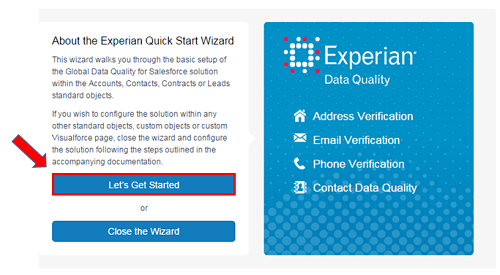
7. This wizard automates the majority of the configuration process and will allow you to set up your configuration and complete the installation. Click “Let’s Get Started” to proceed with the wizard.
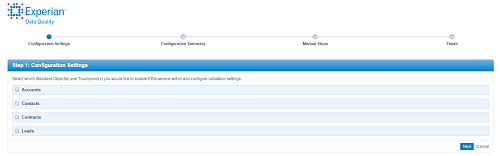
8. The standard objects included with Experian Data Quality for Salesforce are Accounts, Contacts, Contracts, and Leads. Select the object(s) that you would like to enable in the solution.
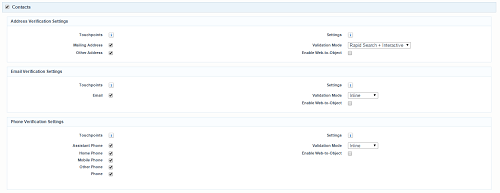
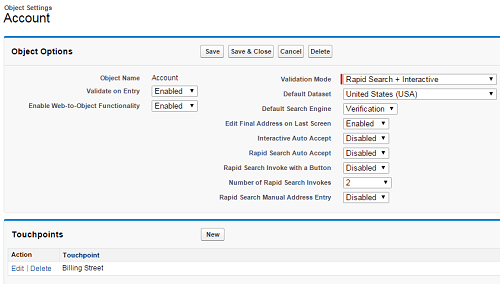
9. After selecting the desired object(s), the address, email, and phone verification settings and their validation modes can be configured. For more details on the validation workflows of each verification capability, reference the Experian Data Quality for Salesforce User Guide or the FAQ section in this guide.
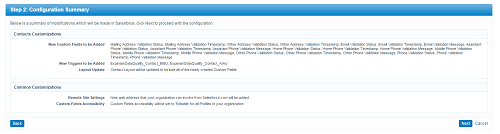
10. Once your configuration has been completed, a summary of the modifications will be displayed based on your settings. If you wish to save customizations to a log file, you will be able to download a description of the modifications made to your account.
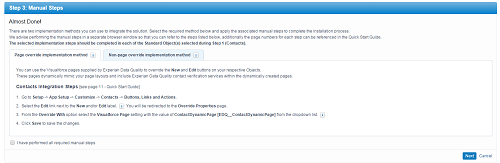
11. Manual steps need to be taken in order to select an implementation method for integrating the solution. Two options are available for integration: Page override and Non-page override.
- Page override uses Visualforce pages to override the new and edit buttons on the object
- Non-page override inserts a Visualforce page to the page layouts in which our functionality will be enabled.
The next steps will walk you through our most common implementation method: page override. This is a best practice method as recommended by Salesforce.
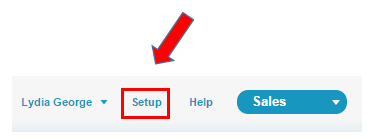
12. Locate and click “Setup” in the top right corner of your screen.
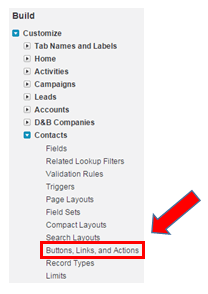
13. In the sidebar, navigate to Customize > Contacts > Buttons, Links, and Actions.
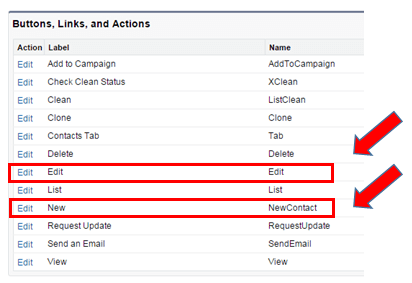
14. Click on “Edit” for the Edit and New labels to edit their override properties.
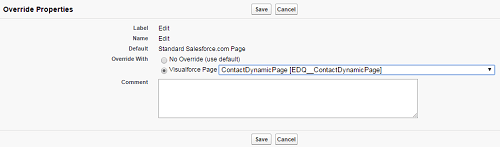
15. Select the “Visualforce Page” option and select the appropriate value in the dropdown.
 16. Once the setup is complete, you will be directed to the administration area for further configuration. This will allow you to edit your address capture workflow, dataset, and more. If you would like to go back and add functionality to the other standard objects, repeat steps 11 through 15.
FAQ
What is the difference between the Page Override and Non-Page Override implementation methods?
Page Override – Uses the Visualforce pages supplied by Experian Data Quality to override the New and Edit buttons on your standard Account, Lead, Contact, and Contracts objects. These pages dynamically mimic your page layouts and include Experian Data Quality contact verification services within the dynamically created pages.
- This method allows the use of the Rapid Search Popup for address validation
Non-Page Override – Alternative method of implementing that does not require overriding the New and Edit buttons. Uses a Visualforce page on the page layout to redirect to the Experian Data Quality page during validation.
- Uses Interactive validation instead of the Rapid Search Popup
What are the different validation modes?
- Rapid Search: The Rapid Search Address Verification workflow is used for both new and edited records. Rapid Search mode allows you to validate an address at the point of entry quickly and accurately, reducing keystrokes and time. (Only available with Page Override)
- Interactive: The Interactive Address Verification workflow is used for both new and edited records. EXPERIAN DATA QUALITY service is invoked when the record is saved, and when a new record is created or edited. When the EXPERIAN DATA QUALITY service is invoked, the user is directed to the EXPERIAN DATA QUALITY Interactive Verification screen to verify an address if interaction is required for the particular address entered. (Available with both implementation methods)
- Passive: Enables silent validation. EXPERIAN DATA QUALITY service is invoked when the record is saved, however the user will not be prompted for verification or interaction as the process is silent. If an address is verified by EXPERIAN DATA QUALITY or if it matched to the building level but the required sub-building information could not be validated, then the address is considered “Verified.”In all other cases, the address will be returned as “Could not be Verified.” (Available with both implementation methods)
- Rapid Search + Interactive: Uses the Rapid Search Address Verification workflow for new record creation and the Interactive Address Verification workflow for edited records. (Only available with Page Override)
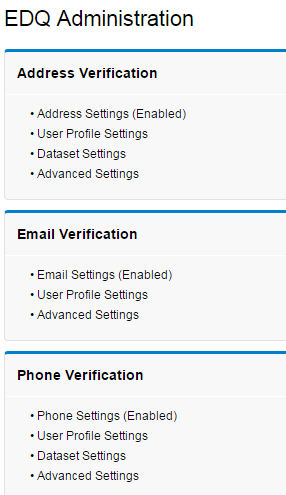
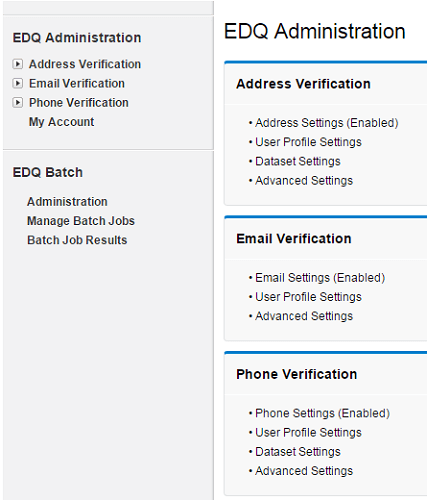
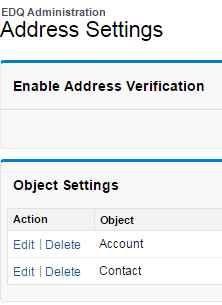
Where can I access the EXPERIAN DATA QUALITY configurations and settings?
- Click on the EXPERIAN DATA QUALITY tab and select the “Settings” option for the service you would like to configure (Address, Email, or Phone).
- From the settings page, you can change the input and output mappings by clicking on the touchpoint listed.

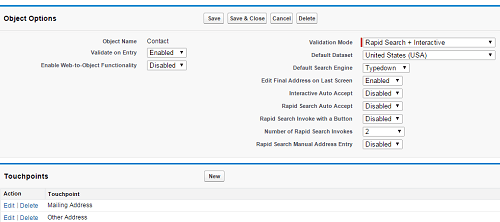
- Object settings can be configured by clicking the edit button to the left of the object you would like to configure.
After following this procedure, your Experian Data Quality for Salesforce should be all ready to go! We want help you avoid data quality errors in your database and empower CRM effectiveness. As your partner in data quality, we take pride in making sure your customer data is always fit for use.
If you have any questions or concerns, please don’t hesitate to reach out to us at +1 (888) 712-3332

